Showing posts with label monotype. Show all posts

Jul 14, 2014

Make Monotypes 3

The monotype class has come to an end.The first weeks I experimented a lot. The last week I was too busy making patterns and opning an account on Spoonflower, so I didn't had time anymore. (You can still vote for my rhinoceros pattern here)


Above and below are two prints with the same stencils. I experimented coloring the stencils with a brush and a brayer. One shape print and a detail (ghost) print. I like the effcect of both. They have their own quality. I was surprised by the detail print.


And here an experiment with fruit. I made lots of them, this one I liked the most:


Another detail (ghost) print of a cat and several circles. I like these textures.
You can't get it like this only on the computer.


During the course I made a lot of monoprint Photoshop brushes and patterns. I scanned backgrounds and changed them into pencils. i'm happy with that, so I can use them to make my work more lifely.

It was fun to experiment and to play. This morning I cleaned up my workspace, because after six weeks of printing it was quite a mess :-)

Jun 22, 2014

Make Monotypes 2

I'm a bit behind with blogging about the Make Monotypes class, which I wrote before. Below one of the prints I made last week: 'wooden shoes', a combination of Monotype and Photoshop.


I'm experimenting a lot and most of the results are not for the viewers eye. 
A whole pile of experiments and lots of learning.

In week 2 we had to look for found object, things from nature, threads, feathers, etc. I like these objects much when they are inkted. I think I like them more than the prints I make ;-)


Second assignment was to make our own stencils and play with them. I liked the thread with it's curls and was inspired to make the print below: the parade. I make other things from what I normal make and I love the textures of this technique.


At the end of the week we made some two color prints with your own stencils. I have the feeling I can work on these more, they are only a beginning of something. I'm not that happy with the colors, mixing them is yet another thing...


The next week was about making your own stamps, first with found stamps. Now I almost can't throw anything away anymore. You can use so many things to make textures. My home is a mess and I need to find space where I can put all these props.


Again I made many prints. I played with abstract figures, a mixture of yoga and acrobatics. I liked the experiment wit negative and positive space. The most easy was to use one color.

There's a learning point to balance my shapes, while using more colors, in a way they will work well  together and interact, without distracting each other.


These prints are sa bit simple. I have the feeling I could do more with it, but at the moment this is where I am. I love the lines you'll get after lifting your stencil of cardboard and make a print of what's left on your plate: the detail print.


And ofcourse I couldn't resist to make a face. The collar of the lady I made with an orange juice press. .(don't know if this is the right english word, but it gives a nice effect)


And for those who are interested:  here is an example of the wooden shoes print you see at top of this post. Before and after I edit it in Photoshop. Before it's nothing, but after playing and experimenting on the computer, I make a whole new image. But I hadn't been able to make this without the basic print. I feel a bit like a magician this way. I surprise myself ;-)


We are halfway the course now. I'm curious what I will make the coming weeks.
Will be continued...


Jun 6, 2014

Make Monotypes 1

This is the first week of the Make Monotypes class with Linda Germain. Till now I like it very much. It brings nice surprises. Here is my latest experiment: 'hello, dear moon'.

Red Cheeks Factory Monotype 1


The first day we had to make a gel plate with glycerine and gelatine. Products I only know by name, but have never worked with. It was quite an experiment to make it. At first I thought: maybe I can skip that part of the lesson, but now I know it's an essential part of the course.

The second day we were asked to gather all kind of 'stamp' materials. With textures on it like stripes,  bubbles, smooth and rough surfaces etc. And make shapes. To keep it simple we only chose one shape. I chose the half circle and made many (way to much ;-)) shapes.


The third day we did  a warm up exercise. During about 20 minutes you follow Linda's  voice on the video and print along. It's fun, but also hard work. I had big red cheeks during the process :-)

It's an exercise to learn  and understand the terms and principles of this gel plate monotype printing. Without thinking to much or judging yourself.

You get two versions of one lay out. First you ink the plate, put some stamps on it and make a 'shape impression'  After that you remove the stamps and print a detail impression. Here is one example of the prints I made:


Now I understand why you need a gel plate. You give pressure on the paper, so that the gel plate moves along under your hands, because it's flexible. So you can see ALL the textures of the stamps in detail. Really fascinating!

The two versions are totally different from each other. It needs much more practice to understand what's happening exactly, but that's one of the reasons why I took this class.

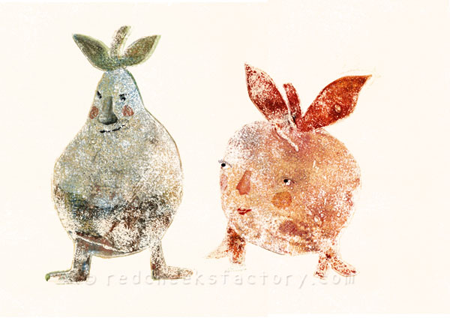
I scanned the detailed impression and edit it in Photopshop. These creatures appeared:


Here's another experiment. It's from a one color monoprint which I played with in Photoshop. I posted it on Facebook and a few people thought it was the Pope! "Bedankt fur die Blüme",  he always says with Easter in Dutch. So here's the Pope amongst his flowers :)


Red Cheeks Factory Montype 2


This was only a part of the first week. I'm looking forward to learn much more!
Will be continued!